Tuesday, June 30, 2020

Joy Clair New Release Featuring A Little Wine and Ooh La La Stamp Sets


Hello Everyone!
Welcome to Day One of Joy Clair's New Release.  Today I am featuring two new Joy Clair Stamp releases, A Little Wine and Ooh La La.  Both of these new stamp sets are so much fun to play with.  My first two cards feature A Little Wine stamp set. 


To make this first card, I die cut a piece of white card stock using the the Pleated Lace Rectangle Die.  I ink blended the card stock and splattered it with black ink and gold paint.  I stamped the image on white card stock, colored it with Copic Markers and die cut it with an oval die from my stash.  I also cut an oval frame out of blue card stock.  I glued the oval to the center of the blended card stock. I stamped the sentiment, cut it out, and framed it with black card stock.  I glued this to the top of the card.  I cut a piece of  black card stock 1/8 of an inch bigger than the blended piece and glued those together.  I adhered this piece to a white A2 card base.  I added gold Nuvo drops for extra bling.


For my next card, I found an ink blended background in my stash and splattered it with black ink.  I die cut a white piece of card stock with a die from my stash.  I glued this to my background.  I stamped the mouse and wine glass onto white card stock and colored them with  Copic Markers  I added Glossy Accents to the wine glass and then sprinkled glitter over it before it was dry.  I fussy cut both stamped images and the sentiment.  I glued them to the background.  I used a black strip from my stash to ground the images.  I offset the sentiment with a piece of black card stock and glued it to the card.  I framed this with a black piece of card stock and glued the whole thing to a white A2 card base.  I added black Nuvo drops for extra dimension.


The next two cards feature the Ooh La La stamp set.


To make this card, I used an alcohol ink blended background from my stash.  I cut an oval from a white piece of card stock measuring 4 inches by 5 1/4 inches.  I cut a piece of acetate bigger than the oval, and glued it to the back of the white card stock to make a shaker card.  I stamped the image, fussy cut it, and colored it with Copic Markers. I glued this to the middle of my blended background so it would be in the middle of the oval.  I added a double layer of foam tape around the back of the oval cut piece, added some sequins, and glued the two pieces together to make the shaker card.  I stamped, fussy cut, and colored the lipstick and eyeshadow case.  I glued these onto the white oval piece.  I added this to an A2 yellow card base.  I added extra sequins to the front of the card.  I cut out both sentiments and framed them with yellow card stock and glued them to the card.  I love how colorful this card is!!!


For the second card, I started with a piece of white card stock.  I stenciled it with yellow and pink inks using the Fish Net Stencil found at Joy Clair.  I offset the stencil to make an over all pattern.  I used clear glitter gel over the pink areas to make them stand out.  I stamped and colored the image with Copic Markers and fussy cut it. I added gold sparkle to the purse.   After the background was completely dry, I glued the image to the card stock and used a yellow  and gold sticker lines to ground the image.  I framed the card with a piece of black card stock cut 1/8 of an inch larger than the decorative piece and then glued this to an A2 gold glittery card base.  **Make sure you clean your stencil and tools right away after using the glitter gel**

Be sure to check all the new stamps sets at Joy Clair Designs. Don't forget to look at the dies and stencils too!  You have your choice of a clear stamp set or a digital stamp set.


Thank you for taking the time to check out my blog.  Please make sure you follow Joy Clair's Facebook PageColor by Faith Bible Journaling Facebook Page, Instagram, and Twitter.  Joy Clair also has a YouTube Channel and Pinterest Page. You can find great inspiration on any of these sites.

I hope you have a chance to look at this fun, new stamp sets. if you have any questions, please leave a comment below or  email me at lindahpd@aol.   Have a great day!  Stay safe.  Stay well!


Happy Creating!!!

Linda

Thursday, June 25, 2020

Fun with Joy Clair's Floral Joy Digital Stamp


Hello Everyone and Happy Summer,

I hope everyone is enjoying the first few days of summer.  I am so glad it arrived.  Along with summer comes so many beautiful flowers.  This week I decided to use the Floral Joy Digital Stamp Set.

Here it today's card:


To make this card, I downloaded the Floral Joy Digital Stamp and printed it onto a piece of 80# white card stock.  I colored the image with Copic markers and fussy cut it out.  I also printed the Cup of Joy Digital Stamp and fussy cut the "Thinking of You" sentiment out.  For the background, I used a piece of white 140# watercolor paper cut to 4 1/4 inches by 5 1/2 inches.  I used Karin Markers to watercolor a plaid background.  I love to free hand background like this.  You could use any watercolors to make the plaid background.  I let the background dry and then accented it with a black marker to make it look more like a plaid.  I cut down the plaid background to 3 3/4 inches by 5 inches and adhered it to a piece of navy card stock measuring 4 inches by 5 1/4 inches.  I die cut the Pleated Lace Rectangle Die out using the third largest rectangle die in the set.  I used an X-acto knife to cut out the middle of the die cut.  I cut right along the inner dotted lines.  I used this piece as a frame on my card.  I glued the frame to my card.  I popped the flower image up with foam tape and placed it in the top left corner of the frame.  I  popped up the sentiment and placed it on the card.  I used a white gel pen to accent the berries and center of the flowers.  I glued the navy card panel to and A2 white card base.  I added blue NUVO drops after the card was assembled for an added accent. 

Here are the links to the products I used:


Joy Clair has some new products in the shop and the Pleated Lace Rectangle is one of them.  I love this die set.  It is super versatile!  It is one of my go to dies! You can check all of the new products at the link below.  


Thank you for taking the time to check out my blog.  Please make sure you follow Joy Clair's Facebook PageColor by Faith Bible Journaling Facebook Page, Instagram, and Twitter.  Joy Clair also has a YouTube Channel and Pinterest Page. You can find great inspiration on any of these sites.

I hope you enjoyed this card.  It is so much fun creating your own backgrounds.  If you have any questions, please feel free to leave a comment or email mail me at lindahpd@aol.  Have a wonderful summer day.  Stay safe and Stay well!

Happy Creating, 

Linda

Thursday, June 18, 2020

Fun with Joy Clair’s Spring Stroll before Spring is Over


Hello Everyone and welcome to my blog!

Today I will be showcasing the Joy Clair Spring Stroll Stamp Set.  Summer will officially be here in a few days, so I wanted to have one last spring fling. 


For today's card I started with a piece of white card stock cut to 5 1/2 inches by 4 1/4 inches.  I used Distress Oxide inks and swiped the stamp pads down and across the panel to make the background.  I set this to dry and cut the white lattice with a cover plate die from my stash.  I stamped the boot and sentiment onto white card stock.  I colored the boot with Copic markers and used my Distress Oxide ink to blend around the sentiment.  I fussy cut the boot and sentiment out.  I wanted the boot to stand out so I used foam tape to pop it up in the center of the circle.  I also used a glitter pen on the boot to make it sparkle.  I popped up the sentiment also.  I adhered this panel to an A2 white card base.  I added small drops of  Nuvo Glitter drops to each intersecting line to give the card added dimension.  I also added Nuvo drops around the boot.  This card could be sent to anyone at any time.  I have listed the link to this darling stamp set below.  I think lots of fun cards could be made with the bicycle and umbrella too!

Here is the link to the Spring Stroll Stamp Set.  This set also comes with a free digital die download (SVG).


Spring Stroll 


Joy Clair Designs is celebrating the owner's birthday with 20% off ALL Digital and Clear Stamp Sets.  Use code:  BIRTHDAY20.  The sale ends June 20th, so you still have a couple of days to get this great deal.  The link for shopping is here.

Thank you for taking the time to check out my blog.  Please make sure you follow Joy Clair's Facebook PageColor by Faith Bible Journaling Facebook Page, Instagram, and Twitter.  Joy Clair also has a YouTube Channel and Pinterest Page. You can find great inspiration on any of these sites.

If you have any questions leave them in the comments or my email lindahpd@aol.


Have a great day and Happy Creating!!!

Linda

Thursday, June 11, 2020

Going Rustic with Joy Clair Stamps


Hello Everyone,

I hope everyone has had a great week so far.  This week I decided to go rustic with two fun clear stamp sets from Joy Clair.  I used both stamp sets on one card. 

This week I decided to try an old technique which I had not used in a while.  It is making my own wood grain background from white card stock.  Here is the finished card.


To make this card I first made the background panel.  I started with a piece of white card stock cut to 4 1/4 inches by 5 1/2 inches.  I used my score board to make vertical lines of varying widths down the 4 1/4 inch side.  I turned the paper to the 5 1/2 inch side and scored each line varying the spaces to make it look like wood planks.  I used my ink pads and lightly rubbed down the panel with 3 different colors of ink.  Be sure to used a light touch and go from top to bottom in one swipe.  This can be done in any colors you like.  I wanted a more realistic wood finish but this technique looks great in any color.  You can always use a black ink pad too.  Once the ink had dried on my panel I die cut it with a rectangle die from my stash.  I used the frame stamp from the Rustic Christmas Sentiments Stamp Set, stamped it with black ink in the middle of the card, and heat embossed it with clear embossing powder.  I colored the branches in with a brown marker.  I stamped the sentiment and pine bows from the Rustic Occasions Sentiments Stamp Set. I colored those in with markers.  I used a tiny gold heart from my stash and some gold sequins to embellish the card.  I mounted the panel on a black piece of card stock and adhered that to an A2 card base.  I posted a closer look at the wood grain below. 


Both of these great stamps sets can be found by the links below. They are both listed in the Last Call sets.  Grab them before they are gone!  They can be used for so many fun cards!!!


Thank you for taking the time to check out my blog.  Please make sure you follow Joy Clair's Facebook PageColor by Faith Bible Journaling Facebook Page, Instagram, and Twitter.  Joy Clair also has a YouTube Channel and Pinterest Page. You can find great inspiration on any of these sites.

If you have any questions leave them in the comments or my email lindahpd@aol.

Have a great day and Happy Creating!!!

Linda

Thursday, June 4, 2020

New Joy Clair FAVORITE COLOR Challenge


Hello Everyone,


It's time for another Joy Clair Challenge on the Joy Clair Stamp Projects Facebook Page. An album for each challenge will be posted on the Joy Clair Clear Stamp Projects Facebook Page. Please upload your entries to this album.

The CHALLENGE today is a COLOR CHALLENGE.   Create a card or project using a Joy Clair stamp or product using your favorite color or colors.   A winner will be randomly picked on June 18, 2020. The winner will be able to pick a free digital stamp of their choice. All entries must be uploaded to the Challenge Album by 11:59 EDT on June 17, 2020.

Here is the card I made for the Challenge using two of my favorite colors.


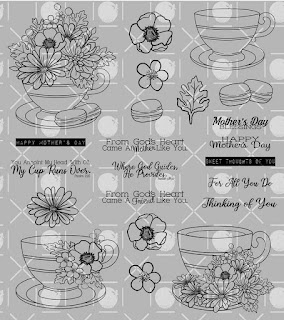
 I used the Cup of Joy Digital Stamp to make this card.  I colored the cup image and 3 of the flowers with Copic Markers.  I fussy cut the images and "Thinking of You" sentiment.  I stenciled a piece of white card stock with a stencil from my stash with two of my favorite colors, yellow and blue.  I die cut the stenciled card stock with a double stitched frame die.  I glued the blue cup image to the middle of the card and placed the flowers in the cup, using foam squares to pop up one of the flowers.  I used a black piece of card stock to frame the sentiment and popped the sentiment up with foam squares.  I found a yellow ribbon from my stash and added it underneath the cup to ground it. I adhered the stenciled piece to an A2 yellow card base.   I added black NUVO Drops as an accent to finish the card.

This great digital stamp set is listed below.  


Thank you for taking the time to check out my blog.  Please make sure you follow Joy Clair's Facebook PageColor by Faith Bible Journaling Facebook Page, Instagram, and Twitter.  Joy Clair also has a YouTube Channel and Pinterest Page. You can find great inspiration on any of these sites.

Take time to play with your favorite colors, and upload them for a chance to win!

Stay safe.  Stay well.

Happy Creating!

linda