Showing posts with label Joy Clair Stamps. Show all posts

Sunday, October 25, 2020

Woofing You A Merry Christmas

 Hello and welcome to my blog!  

It is certainly hard to believe that Christmas is only two months away from today!!!  I hope everyone is getting a start on those Christmas cards.  Today I am showcasing the Dog Gone Digital Stamp Set.  This set is also available as a clear stamp set.  


My card for today is an A2 card (4 1/4 x 5 1/2 inches) made with white card stock.  To begin I stamped a piece of white card stock with a music background cover stamp in light gray so it would just be a background and not too bright.  I cut out the sentiment, dog, dog house, and bone from the digital download and colored these pieces with Copic Markers.  I used a stencil from my stash to make the clouds and green ink for the ground.  I drew trees in the background using a Copic Marker.  I glued the dog house on the card after gluing the bone in the entrance of the dog house.  I used foam tape to pop up the dog in front of the house.  I used white ink and a sponge dauber to put the snow on the the card.  I used grey ink to make the shadows under the dog and dog house.  I used a dog print stamp from my stash to make the dog prints.  I splattered white paint to make it look like it was snowing.  I popped up the sentiment, added a few sequins, and the card was finished.  If you had the clear stamp set, there are paw prints available to put them on the card.  

I enjoyed playing with this stamp set.  There are two adorable dogs in this set, I chose the one that reminded me more of my dog and looked like he was singing.


Thank you for taking the time to check out my blog.  Please make sure you follow Joy Clair's Facebook PageColor by Faith Bible Journaling Facebook Page, Instagram, and Twitter.  Joy Clair also has a YouTube Channel and Pinterest Page. You can find great inspiration on any of these sites.

I hope you have time to check out this great stamp set and all the other crafty goodness at Joy Clair. Joy Clair is also carrying lots of fun dies and stencils.  If you have any questions, please feel free to comment below or email me at lindahpd@aol  Stay safe and stay well!


Happy Creating, 


Linda


Saturday, October 10, 2020

Backgrounds and Sentiment Cards

 Hello Everyone and welcome to my blog.

Today I am showcasing "Band Together".  This is available both as a digital stamp set and a clear stamp set.  I am using the digital version of the set.


My first card is an A2 size card( 4 1/4 x 5 1/2 inches) on a white card base. I ink blended the background on a piece of white card stock with a stencil from my stash.  I die cut the piece with the Pleated Lace Rectangle Die.  I glued the die cut piece to a red piece of card stock and glued this to the card base. I printed the out the Band Together Digital Stamp set and cut out the sentiment.  I glued this to a piece of red card stock and cut around it to make a shadow for the sentiment. I glued this to the middle of the card and accented it with sequins from my stash.  A fun card with just a background and sentiment!


The second card is also an A2 card.  I ink blended a background on a piece of white card stock and sprayed it with a glitter spray from my stash.  I die cut the circle piece with the Polka Dot Cover Plate and glued it to the ink blended piece.  I glued the whole thing to the white card base. I cut out the 3 sentiments, layered them with purple card stock, and popped them up with foam tape.  With the glitter on the blended piece, there was no need for any further embellishments.  

Both of these cards use a fun background and sentiments.  I love the way they turned out!

Thank you for taking the time to check out my blog.  Please make sure you follow Joy Clair's Facebook PageColor by Faith Bible Journaling Facebook Page, Instagram, and Twitter.  Joy Clair also has a YouTube Channel and Pinterest Page. You can find great inspiration on any of these sites.

I hope you have time to check out this great stamp set and all the other crafty goodness at Joy Clair. Joy Clair is also carrying lots of fun dies and stencils.  If you have any questions, please feel free to comment below or email me at lindahpd@aol  Stay safe and stay well!


Happy Creating!!!

Linda
 

Tuesday, September 29, 2020

National Coffee Day Blog Hop


Hello and welcome to my blog.  Today I am here with Joy Clair Designs creating along with the National Coffee Day Blog Hop. Joy Clair is a Super Sponsor in the blog hop.  Take time to check all the great creations on the Coffee Lovers blog hop for a chance to win a great prize.

Please be sure to check out the Joy Clair Designs Blog and see all the wonderful creations made by the design team members.  Joy Clair has a great collection of coffee stamps, both digital and clear stamps. In honor of the hop, Joy Clair is offering a 25% discount on all coffee themed stamps, digital and clear, from September 29th to October 2nd, 2020 using the code NCD2020.  One $15.00 gift card to Joy Clair Designs for stamps only, will be given to one lucky person who left a comment on the Joy Clair Designs Blog only.  Good Luck!

I am using the "Coffee First" digital stamp set for my card. 


To create this card I die cut the Polka Dot Cover Plate Die from a heavy piece of card stock.  I used this die cut as a stencil and stenciled onto a white piece of card stock using difference shades of brown ink.  I cut this piece to fit inside of the brown frame made by using the Pleated Lace Rectangle Die and a brown piece of card stock.  I glued the polka dot piece to the rectangle die cut piece and sprayed that with a glitter mist.  I cut a piece of navy blue card stock to 5 1/4 x 4 inches to layer onto the A2 white card base.  I glued the brown polka dot piece to the navy piece and placed that onto the white card base. I printed the download onto an 80# piece of white card stock and fussy cut the sentiment and the cat image.  I colored the cat with copic markers and glued to sentiment to a piece of navy card stock.  I popped up both of these with foam tape and placed them on the card.  I used a thin blue line sticker to ground the image.

I have linked to the "First Coffee" digital stamp set below.  There are lots of fun images and sentiments with this stamp set!


Thank you for taking time to check out my blog and the National Coffee Day Hop!    Please make sure you follow Joy Clair's Facebook PageColor by Faith Bible Journaling Facebook Page, Instagram, and Twitter.  Joy Clair also has a YouTube Channel and Pinterest Page. You can find great inspiration on any of these sites.

I hope you have time to check out this great stamp set and all the other crafty goodness at Joy Clair. Joy Clair is also carrying lots of fun dies and stencils.  If you have any questions, please feel free to comment below or email me at lindahpd@aol  Stay safe and stay well!


Happy First Coffee!!!

Linda

Thursday, April 16, 2020

Fun with Joy Clair Designs NEW "Succulent Frame" Digital Download/Stamp Set

Hello Everyone,

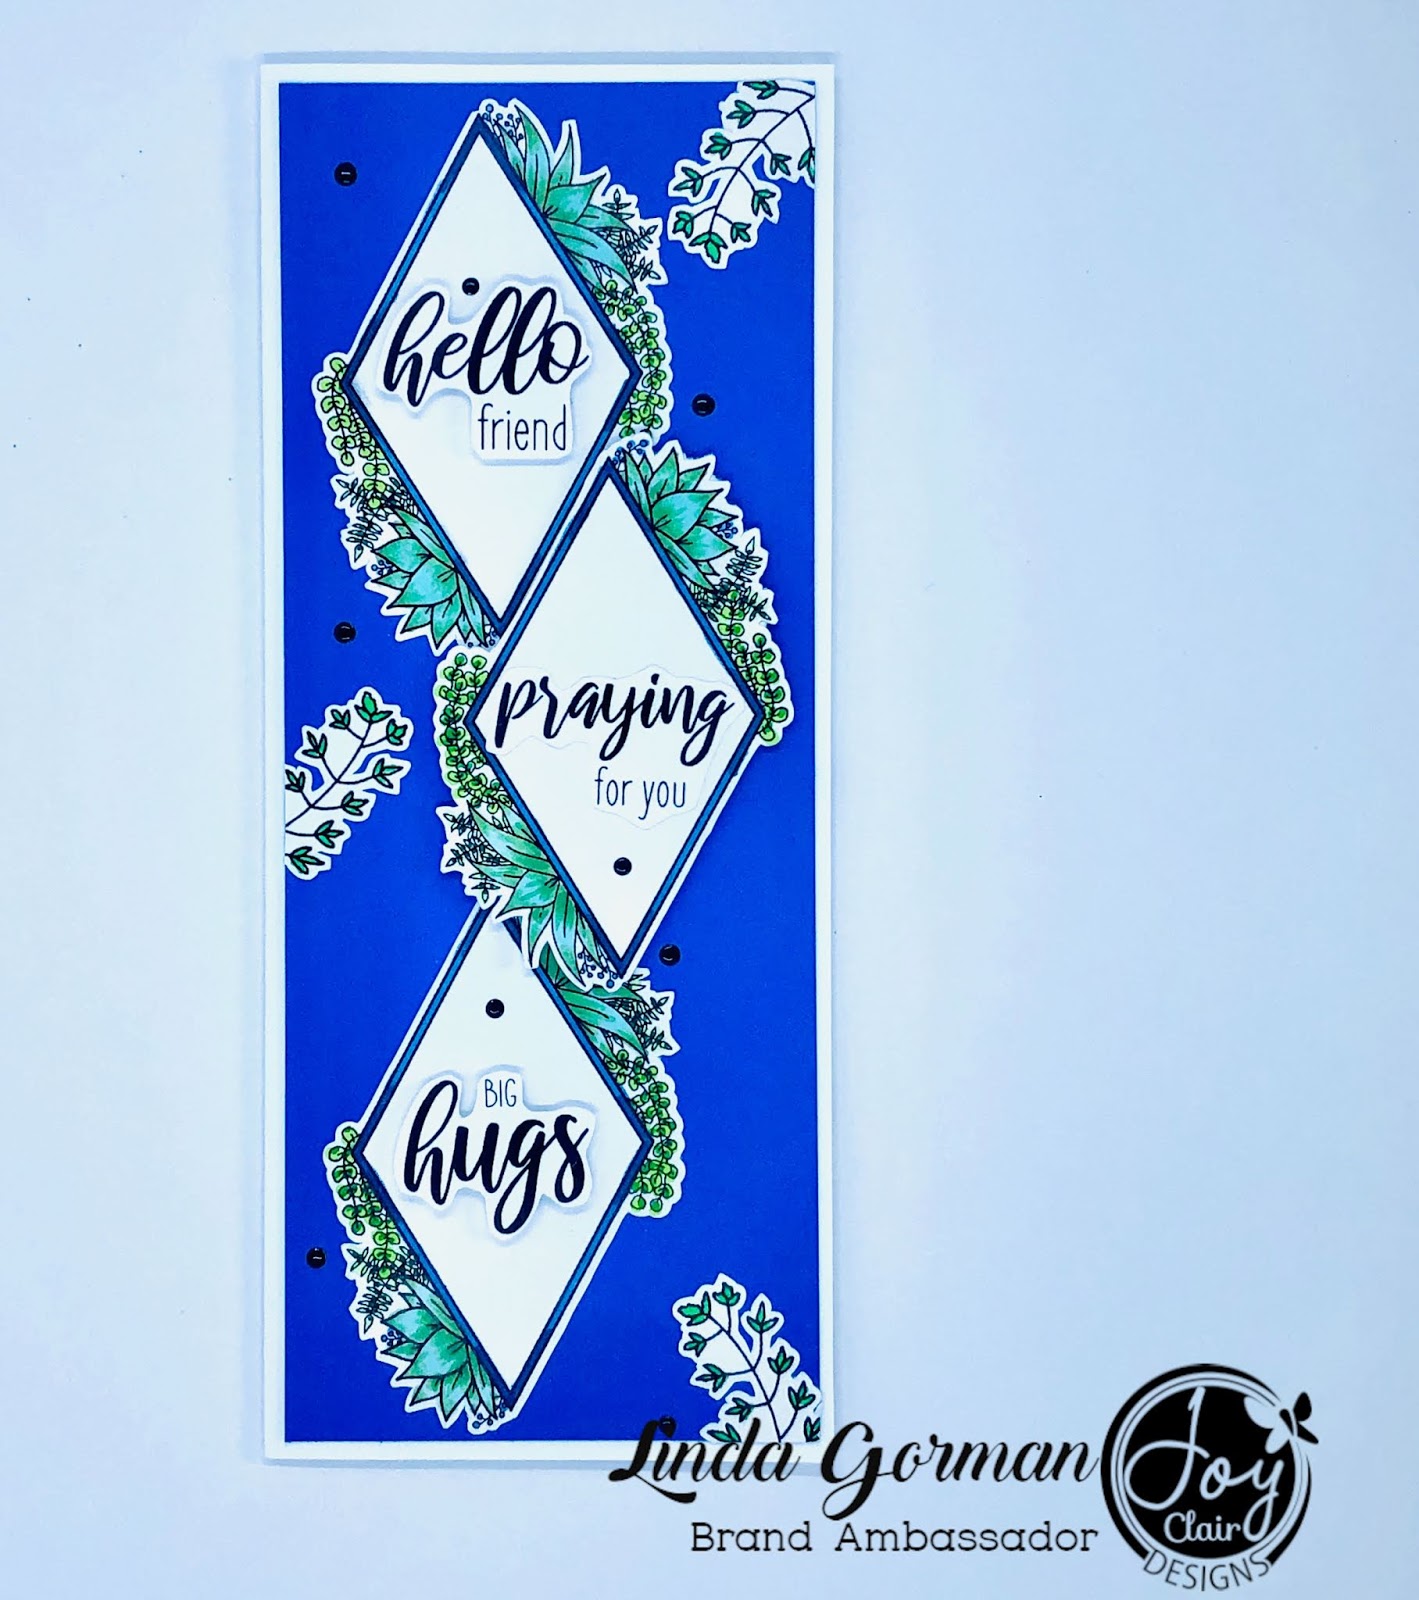
Today I am featuring Joy Clair Designs NEW "Succulent Frame" Digital Download/Stamp Set.  I decided to make a long card which will fit into a business size envelope.


For today's card, I started with a piece of blue card stock cut to 3 1/4" x 8 1/4".  I printed the digital download image out three times and fussy cut each frame image along with all three sentiments and some leaf sprays.   I colored the images with COPIC markers and adhered them to the blue card stock cascading down the card.  The middle image was popped up with foam squares.  I placed the leaf sprays cascading down the card too.  I used black NUVO Drops for an accent.,  After the drops dried, I adhered the blue card stock to a white card base.  The card base was made from a piece of white card stock cut to 7" x 8 1/2" , folded in half at 3 1/2".

It's so much fun to experiment with new card sizes!  If you have any questions, please leave them in the comments or email me at lindahpd@aol.com.  Please take a minute and check out all the great new products at www.joyclair.com.


Here are the links to the Succulent Frame Stamp Set and Digital Download.

Happy Creating!

linda


Thursday, April 9, 2020

Joy Clair Stamps Think Spring Challenge

New Joy Clair Challenges


Hello everyone!

Starting today and continuing on the 2nd and 4th Thursdays every month is the New Joy Clair Challenge on the Joy Clair Clear Stamp Projects Facebook Page. An album for each challenge will be posted on the Joy Clair Clear Stamp Projects Facebook Page.

The CHALLENGE today is THINK SPRING.   Create a card or project using a Joy Clair stamp or digital download showcasing anything that reminds you of spring. A winner will be randomly picked on April 23rd. The winner will be able to pick a free digital download of their choice. All entries must be uploaded to the Challenge Album by 8AM EDT on April 23rd.

Here is an example of a card I made.


To make this card, I ink blended the background, cut a pink oval with an oval die set, and colored the image from the Bunny Greetings Digital Download.  I fussy cut the flower pot and sentiment and glued them to the oval.  I then glued the oval to the ink blended background and placed that on the white A2 card base.


To make this project I colored and fussy cut the images from the Bonnie Bunny Digital Download. I glued the images to a purple piece of card stock 1" wide and 12" long.  I wrapped it around each candle, glued the ends together and cut off the excess.

Both of these projects were made using the digital downloads by CraftyMelinda.com

Have fun creating. I am looking forward to seeing everyone’s creations. Have fun and Think Spring!


Linda


Tuesday, March 31, 2020

Joy Clair Stamps New Release: Succulent Frame


Hello Everyone,

Welcome to Day 2 of the Joy Clair Stamps new release.  Today I will be featuring two projects showcasing the Succulent Frame set.  


My first project is using the Succulent Frame Digital Download.   I enlarged the download on my computer until it was a little bigger than an A2 card (4 1/4" x 5 1/2").  I printed it with my laser printer onto a piece of 80lb white card stock.  I cut out all the images on the download with my Scan-n-Cut cutting machine and colored all the images with Copic markers.  You could use any coloring medium you have in your stash. I am using a white card stock base cut to 5 1/2" x 8 1/2", scored at 4 1/4" on the 8 1/2" side and folded into an A2 card base.  I die cut a piece of card stock from my background stash that I had used ink smooshing on with several colors of blue inks.  I also cut a piece of vellum to cover the die cut piece which measures 4 1/4" by 5 1/2".  I decided to use the vellum to tone down the background.  I glued the vellum to the blue piece and then popped out the cut out succulent frame to the card.  I arranged the other flowers and leaves around the frame.  I fancy cut out the "Hello" sentiment and popped it up in the middle of the frame.  I used silver stickers to add extra dimension to the frame.  I sprayed the entire piece with glitter spray and adhered it to the card base.  I cut pieces off the top and bottom of the frame to make it fit into an A2 envelope.


My next project using this download is a place card holder.  I printed the download twice on white 80lb card stock and cut out the succulent frame.  I colored the frame with Copic markers similar to my first card.  I cut pieces of colored card stock to 3 3/4" by 5 1/2", scored at 2 1/2" on the 5 1/2"  side and folded to make a place card holder that stands.  I die cut a piece of the same card  stock with a stitched die that was almost the same size as the place card holder.  I glued that to the card holder and then glued the colored frame to the card holder.  I used Nuvo Dream Drops Gold Lux to add a little sparkle.  You could use these on a buffet and write what the dish is on the card holder or write your guests names on them at your dinner table.  They could even be used as name tags without putting them on the card base.

***The card stock I use to print my downloads on is 80lb Neenah Solar White.  Any layering weight card stock would work.***

The links to these products will be listed below.


To celebrate this new release, Joy Clair is giving away a $25 gift card valid for stamps only at Joy Clair Designs Store. We are offering our new release with a 20% OFF until April 5th. You don’t need to use a code. The prices are automatically reduced. In order to be entered to win, all you need to do is hop along with us and comment on each blog. Hoppers must comment on all stops along the way. Comments are due by 04/5/2020 at 11:59 PM EST. Winner will be announced on the Joy Clair Designs Blog on April 8th, 2020.  


Here is the list of names for the hop:


Thank you all for taking the time to stop on my blog.  If you have any questions about any of the projects, please leave a comment or email me at lindahpd@aol.com. I hope you all have a crafty day and STAY SAFE-STAY WELL during these challenging times.


HAPPY CREATING!!!

linda


Monday, March 30, 2020

Joy Clair Stamps New Release: Go There and My Heart


Hello everyone,

I am so happy that I get to help introduce Joy Clair Stamps new release!  Today I am featuring Go There and My Heart releases.  These new stamps and digital downloads are amazing !  Let's check out Go There first.


For my first card, I chose the Jelly Bean Background Digital Download and the Go There Digital Download.  I printed both downloads on a laser printer and foiled them with my laminating machine.  I cut a 3 3/4" square from the foiled Jelly Bean Background download and placed it on a piece of black card stock cut to 3 7/8 " ( or just big enough to add a small frame around the background). I fancy cut the cow and sentiments out and used pop dots to place them on the background.  I used Nuvo  Dream Drops Gold Lux on the necklace and set it aside to dry.  After it was dry, I used a liquid glue and adhered it to a gold glitter card base which I cut to a 4"x 4" square.


My second project using the Go Happy Digital Download is a bookmark. I chose an ink smooshed background from my stash and cut it into a 2 1/2" x 5 1/2" piece.  Next I cut a piece of kraft card stock to the same measurements. I glued these two pieces together.  I cut angles on the top of the bookmark and punched a hole in the center top with a hole punch.  I fussy cut the cow image and sentiment from the download and adhered them to the front of the bookmark.  I used Nuvo Crystal Drops (Violet Galaxy and Bubblegum Blush) to accent the necklace.  I drew an edge around the whole piece with a black, thin-lined marker.  For the back I used the same marker and wrote "Just a note..." and added the dotted lines. I used a purple piece of ribbon and looped it through the hole on top.  This would be fun to give to someone who is trying to catch up on their reading and they can add notes or are make a list of the books they read on the back.


My next cards feature  My Heart.
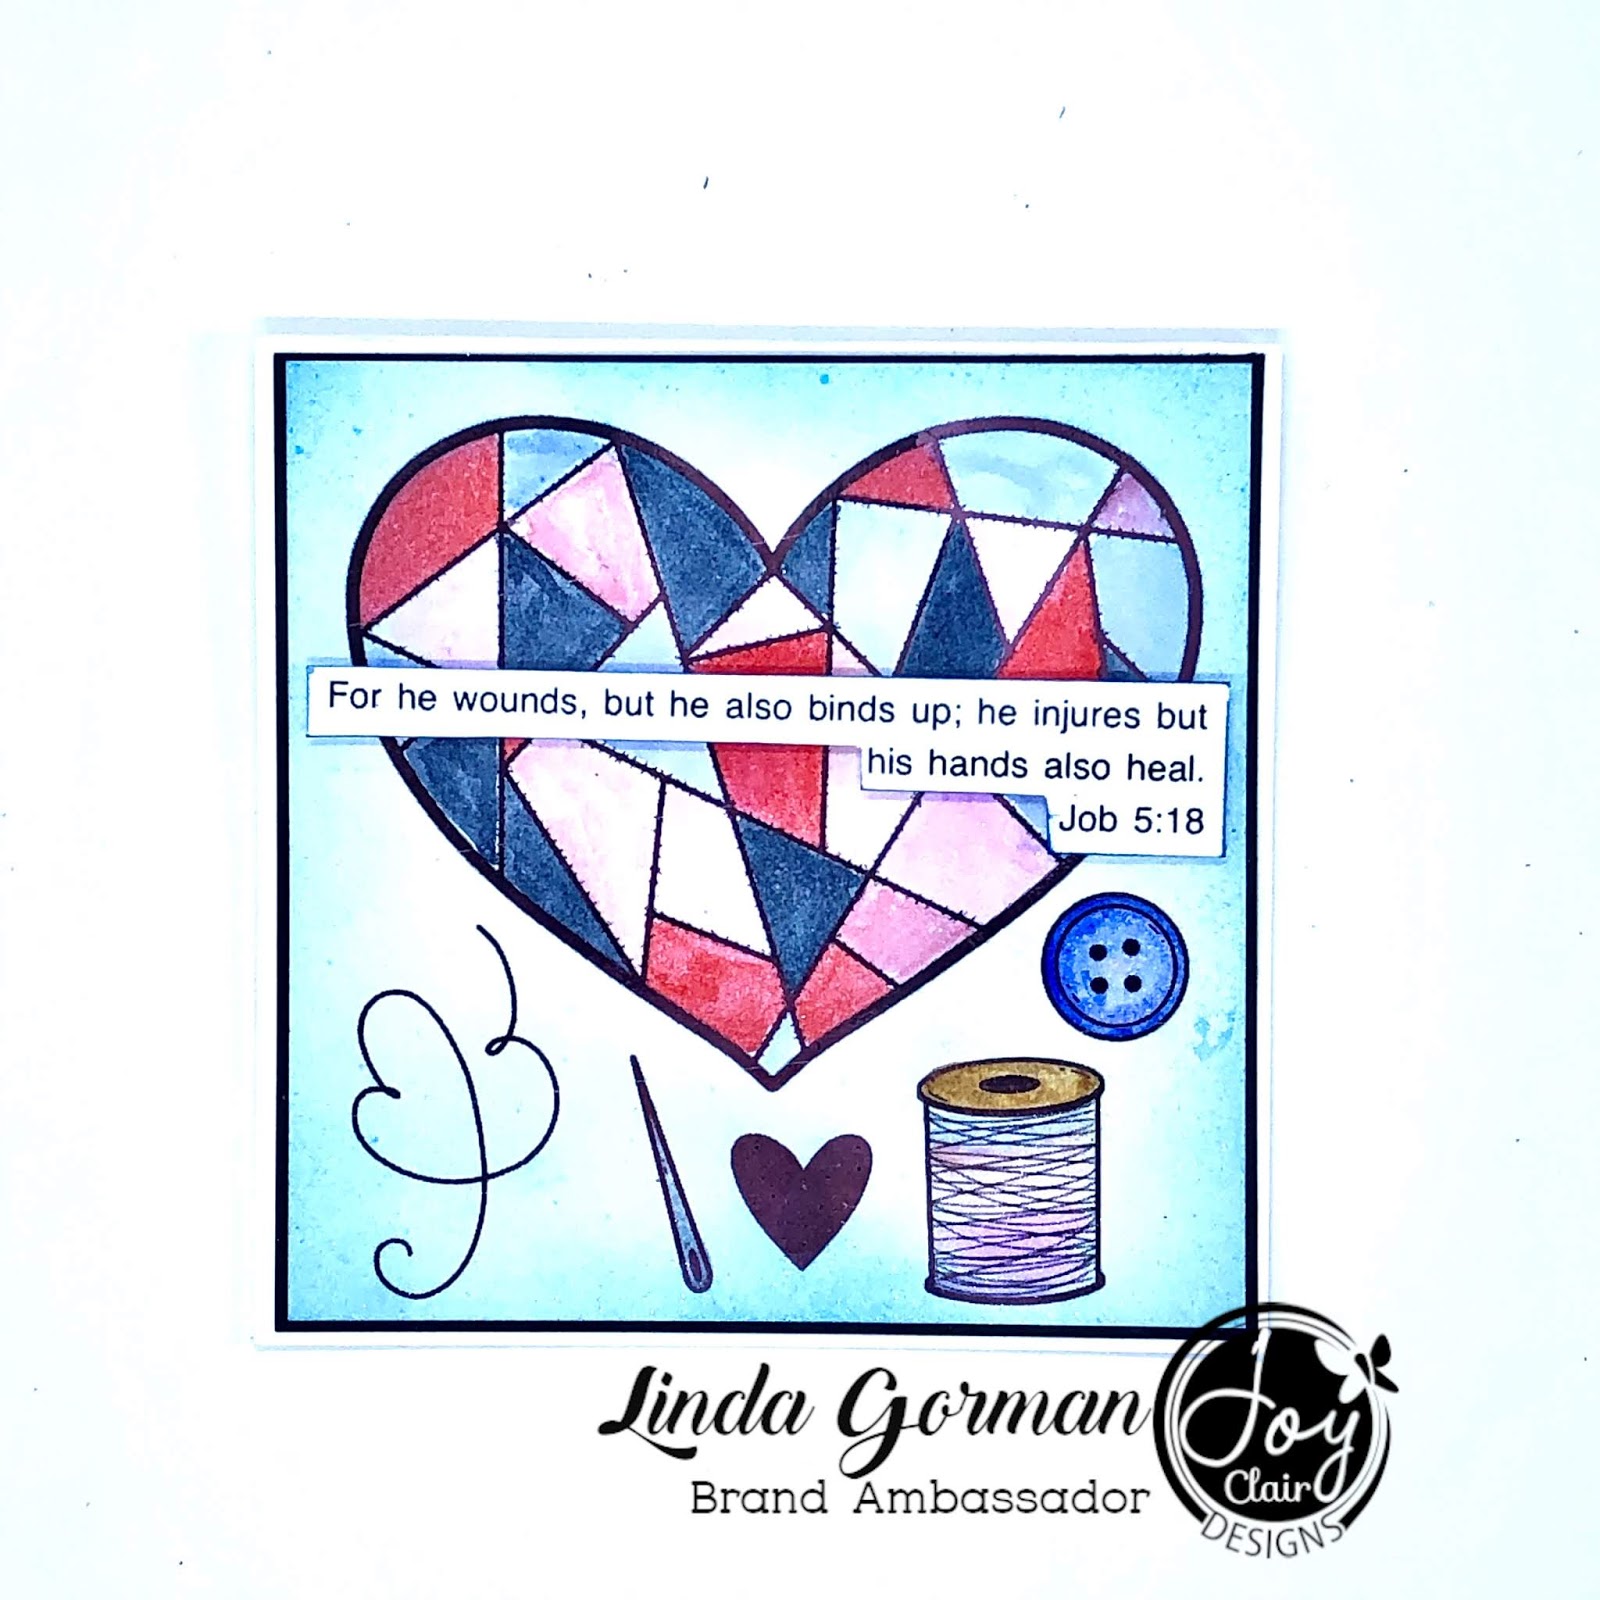
I decided to make this a square card also.  I first cut the card base out of a piece of white card stock measuring 8 1/2" x 4 1/4" , scoring at 4 1/4 " on the 8 1/2" side and folding it into a 4 1/4" square card base.  I cut  a 4" square from the digital download which included all the above images except the sentiment.  I foiled all the images with a pink foil and then colored them with watercolor markers.  I used Zig Clean Real Brush markers but you could use any markers or colored pencils in your stash. After the background was colored, I sprayed it with a sparkle spray and adhered it to a 4 1/8" square piece of black card stock..  I adhered that to the white card base.  I cut out the sentiment and popped it up with foam strips and placed it on the card. 


My second card is an A2 card (5 1/2" by 4 1/4").  I cut a piece of white card stock measuring  5 1/2" x 8 1/2", scored at 4 1/4 on the 8 1/2" side, and folded to make the A2 card base.  I  watercolored a piece of white card stock using a variety of pink inks and die cut it with Gina Marie Designs Loopy Frame die.  I adhered that to a piece of black card stock cut to 4" x 51/4".  I enlarged the digital image on my computer before printing.  You could also take it to an office store and have them enlarge and laser print it.  I always take my own card stock to the office store, it makes it less expensive and you know what it is being printed on.  I fussy cut out the thread and needle and foiled them with pink foil.  I adhered them to my die cut piece.  I took a piece of twine and glued it to the card around the needle.  I didn't have a pink piece of twine so I used a pink ink pad to make the twine pink.  I cut out the sentiment , glued it to a piece of black card stock, and then cut around the sentiment, leaving a black frame.  I used foam strips to pop it up and adhered it to the die cut piece. I sprayed the piece with glitter spray and glued the entire piece to the white card base.


***The card stock I use to print my downloads on is 80lb Neenah Solar White.  Any layering weight card stock would work.***

The links to these products will be listed below.

To celebrate this new release, Joy Clair is giving away a $25 gift card valid for stamps only at Joy Clair Designs Store. We are offering our new release with a 20% OFF until April 5th. You don’t need to use a code. The prices are automatically reduced. In order to be entered to win, all you need to do is hop along with us and comment on each blog. Hoppers must comment on all stops along the way. Comments are due by 04/5/2020 at 11:59 PM EST. Winner will be announced on the Joy Clair Designs Blog on April 8th, 2020.  


Here is the list of names for the hop.


  • My Heart Clear Stamp Set    
  • My Heart Digital Stamp Set  
  • Thank you all for taking the time to stop on my blog.  If you have any questions about any of the projects, please leave a comment or email me at lindahpd.aol.com. I hope you all have a crafty day and STAY SAFE-STAY WELL during these challenging times.


    HAPPY CREATING!

    linda